Saturday, November 28, 2009

Bread Stuffing with Sausage, Cranberry, and Dried Apple


Our family stuffing has always included sausage. Nothing brings a flavor punch like a pound of pork sausage browned up and added to your stuffing (especially when it's not actually going in the bird). This is the second or third year that I've been preparing stuffing for the Thanksgiving and Christmas holiday meals, and it's undergone some evolutions. We started adding dried cranberries to the bread stuffing once dried sweetened cranberries became available regularly; this Thanksgiving I had dried apples on hand, and the added sweetness went well with the pork sausage.

This recipe is based on America's Test Kitchen's basic "Classic Stuffing for a Crowd" recipe, which is a great base for trying your own interpretations for the next holiday gathering. It's very easy, and can be made with (plain) storebought bread cubes in place of homemade--just make sure to increase the amount of chicken broth to 7 cups to compensate for the lower moisture content.

ATK points out that you can air-dry the bread cubes if you work it a day (or, ideally, two) ahead of time; but, if you don't want 5 cookie sheets with ½-inch bread cubes drying in a single layer taking up counter space in your kitchen, you can dry the cubes in a 300-degree oven for 30-60 minutes and let them cool prior to mixing with the other ingredients.

Ingredients
1½ pounds bulk breakfast sausage
12 tablespoons butter (1½ sticks), plus extra for baking dish
4 medium ribs celery, chopped fine
2 medium onions, minced
½ cup minced fresh parsley leaves
3 tablespoons minced fresh sage leaves (or 2 teaspoons dried)
3 tablespoons minced fresh thyme leaves (or 2 teaspoons dried)
1 tablespoon minced fresh marjoram leaves (or 1 teaspoon dried)
3 pounds high-quality sandwich bread (white), cut into ½-inch cubes and dried
1 ½ cups dried sweetened cranberries
¾ cup dried apple, diced medium
5 cups chicken stock or low-sodium chicken broth
4 large eggs, beaten lightly
2 teaspoons table salt
2 teaspoons ground black pepper

Hardware
large skillet (12 inches minimum)
very large mixing bowl
wooden spoon
15 x 10-inch baking dish (see step 3 for substitutions)
baking sheet (for drying bread cubes)
aluminum foil

Instructions

1. Adjust oven rack to center position and heat oven to 400 degrees. Cook sausage in a large skillet over medium heat, breaking it up into smaller pieces with a wooden spoon, until lightly browned, 5 to 10 minutes. Remove the sausage from the skillet and reserve. Drain the fat, and reserve.


2. Either add all the butter to the now empty skillet, or substitute the reserved sausage fat for an equal amount of butter -- you'll need a total 12 of tablespoons of fat. Add the celery and onion and sauté, stirring occasionally, until softened, about 10 minutes. Stir in parsley, sage, thyme, and marjoram and cook until fragrant, about 1 minute longer. Transfer to a very large mixing bowl.


3. Add the sausage, cranberries, apple, dried, cooled bread, stock or broth, eggs, salt, and pepper to the vegetables and toss gently to distribute dry and wet ingredients evenly. Turn mixture into buttered 15-x 10-inch baking dish. (If you don't have a 15 x 10 dish, here is a guide to substitutions--more mixture in a smaller dish means a denser texture.)

4. Cover with foil and bake for 25 minutes. Remove the foil and continue to bake until golden, about 30 minutes longer. Cool for 10 minutes before serving.


To Make Ahead: The stuffing can be assembled in the baking dish, then wrapped tightly in plastic wrap and refrigerated for up to 24 hours before baking. To bake, let the stuffing stand at room temperature for 30 minutes. Remove the plastic wrap and proceed to bake as directed in step 3.

Saturday, October 10, 2009

UPDATE: Apple Slicer Review


In its September 1 issue, Cook's Illustrated reviewed apple slicers. It turns out their criteria for an apple slicer is pretty much what mine were --they wanted something sturdy that made clean, even slices of even firm, thick-skinned Granny Smith apples with minimal effort.

Fortunately, their pick is the one I already own--the Williams-Sonoma Dial-A-Slice Apple Divider:

Its wider-than-usual, 1-inch, serrated corer gripped the apple and ensured the entire core was removed. We also liked the comfortable rubber handles and plastic cap that pushes the hard-to-reach bottom of the apple entirely through the blades. (Other models left slices attached, forcing us to push the apple back up, which meant we were handling the sharp blades.)
Good to know my impulse buy compares well. Check out their review.

Sunday, October 4, 2009

Cranberry Shortcake


"Cranberry shortcake?"
Don't sound so dubious, this will be delicious. I first made this dessert last year for some friends during one of our infamous card nights (Euchre, anyone?) But I've been eating this dessert for much longer than that--every fall that I can remember, the restaurant at the annual church fair serves up hundreds of these things. This is one of the stars of the fair, every year.

There are some truly heinous recipes for cranberry shortcake out there. Many of them are methods of using up leftover Thanksgiving cranberry sauce. Imagine jellied cranberry sauce over pound cake or angel-food cake and you get the idea. This recipe uses fresh cranberries and has a great tart-sweet flavor. It's also incredibly easy to make.

My personal prejudice when it comes to any dish that calls itself "shortcake" is that nothing that could, on its own, be called "cake"--that is, angel food cake, chiffon or yellow cake, pound cake, etc.--should ever be involved. "Shortcake" means one thing, and one thing only: biscuits. This recipe calls for buttermilk biscuits, which I've included instructions for, but if you don't feel like going to that kind of effort, just use Bisquick--it'll be fine.


Ingredients
Fruit
2 cups of fresh cranberries
1 medium apple
1 banana
2/3 cup sugar

Biscuits
2 cups unbleached all-purpose flour (10 ounces)
2 teaspoons baking powder
2 tablespoons sugar
3/4 teaspoon table salt
2/3 cup buttermilk, cold (see note)*
1 large egg
8 tablespoons unsalted butter, melted and cooled slightly

Whipped cream
1 cup heavy cream
1 tablespoon sugar
1 teaspoon vanilla extract

Hardware
food processor
hand mixer or stand mixer
3 bowls (for whipped cream, biscuit dough, and cranberries)
baking sheet

Directions

For the Fruit:
  1. Coarsely chop cranberries and apple. (Make this easy on yourself and pulse in a food processor. Who wants to chop 2 cups of cranberries?) Add sugar to taste and mix until blended.
  2. Refrigerate cranberry mixture 2 to 3 hours to mingle flavors.
  3. Dice the banana and add to mixture shortly before assembling shortcakes.

For The Biscuits:
  1. Adjust oven rack to middle position and preheat oven to 475 degrees.
  2. Whisk flour, baking powder, 1 tablespoon sugar, and salt in large bowl.
  3. Whisk together buttermilk and egg in medium bowl; add melted butter and stir until butter forms small clumps.
  4. Add buttermilk mixture to dry ingredients and stir with wooden spoon until dough comes together and no dry flour remains. Continue stirring vigorously for 30 seconds.
  5. Using greased 1/2 cup dry measure, scoop up mound of dough and drop onto parchment-lined rimmed baking sheet (if dough sticks to cup, use small spoon to pull it free). Repeat with remaining dough, spacing biscuits about 1 1/2 inches apart, to create 4 biscuits.
  6. Sprinkle remaining tablespoon sugar evenly over top of biscuits. Bake until tops are golden brown and crisp, about 15 minutes. Transfer to wire rack and let cool 15 minutes before assembling.

For The Whipped Cream:
  1. Using hand mixer or stand mixer fitted with whisk attachment, beat cream, sugar, and vanilla on low speed until bubbles form, about 30 seconds.
  2. Increase speed to medium; continue beating until beaters leave trail, about 30 seconds longer.
  3. Increase speed to high; continue beating until nearly doubled in volume and whipped cream forms soft peaks, 30 to 45 seconds longer.

To Assemble:
Split each biscuit in half and place bottoms on individual serving plates. Spoon portion of cranberry mixture over each bottom. Top cranberries with 2 tablespoons whipped cream, cap with biscuit top, and dollop each shortcake with some of remaining whipped cream. (Or, add more cranberries and even more whipped cream.) Serve immediately.

Makes 3-4 servings

*Don't feel like buying buttermilk? Add lemon juice to regular milk (at least 2% fat) in the ratio of 1 tablespoon to 1 cup, and let stand for 15 minutes. Use for an equal volume of buttermilk in any recipe.

Saturday, September 26, 2009

Extra Virgin Olive Oil Tasting

I don't mean to be obsessed with extra virgin olive oil.


But, it is one of those products that, when it's good quality, can make a basic sandwich or vinaigrette better. (My personal favorite is sopressata, provolone, and tomato on bread spread with olive oil vinaigrette.)


And yet, the bottles are a mystery--in any given supermarket or boutique grocery, there could anywhere from a half-dozen to a baker's dozen different brands and/or varieties. There's also no guarantee how long a particular bottle has been sitting on the shelf, exposed to light and heat. When higher-end olive oil can easily go for $30-$50 per liter, a bad bottle can be an expensive disappointment. But I've talked about this before.

In the incident that led directly to this blog post, I found myself purchasing a bottle of Colavita at Whole Foods in Washington Square, Brookline.

"Is this yours?" asked the checkout woman.
"Uhhh....yeah," I said, articulately.
In a friendly, slightly superior air: "You should put that back and get the 365 brand. It's really high quality and half the price."

I was reluctant to tell her to mind her own business, for some reason, so I ended up buying both--rationalizing my decision by hitting on the idea of a taste test.

In this highly unscientific taste test, I and one other person tasted five different olive oils.
Four of them were widely available supermarket brands: DaVinci, Filippo Berio, Colavita, and 365, the Whole Foods brand. We also added a ringer--Cook's Illustrated's favorite premium extra virgin olive oil, Columela, which I've written about previously (same link as above).

It was a blind taste test, in which we tasted each olive oil plain, and then drizzled on some bread. Each of us then ranked the oils in order of preference, and scored them. A first place vote from a taster received 10 points, a second place vote, 8 points, a third place, 6 points, and so on.

Here are the results, from worst to first:

4th place (tie): DaVinci Extra Virgin Olive Oil, $16-$17 per liter


Both tasters were more or less in agreement on this one--this was supposed to be extra virgin olive oil? "Not a very strong flavor," wrote Taster One. "Well...it's oil," wrote Taster Two.

Taster One liked it a bit better overall, finding "nice herbal notes" when tasted straight that were masked when eaten with bread. Taster Two thought Taster One was nuts.


4th place (tie): Colavita Extra Virgin Olive Oil, $24 per liter


Both tasters found this oil strongly flavored, although they couldn't agree whether that was necessarily a good thing. Taster One found it had an "interesting musky flavor, but...not enough bite to cut through." Taster One seemed to get more and more repulsed by this oil, saying that the bread didn't "mask enough" of the flavor. "It almost tastes spoiled."

Taster Two liked it better, but found it so pungent when tasted straight that it stung the palate. "It has character...very smoky, but with green and briny accents. It's a little overwhelming...I wanted to like this more than I did." Taster Two concluded that "it could be great for dressings, salads, where you're not eating it BARE."

Although Tasters One and Two put Colavita in fifth and fourth place, respectively, based on the oil tasted straight and on bread, after the tasting, we gave it a second chance. Used in a simple vinaigrette, it held up, and gave a basic green salad a huge flavor payoff.

Colavita Fruttato (apparently a premium version of the Colavita we tasted here) was a Cook's Illustrated runner-up in their July 2008 tasting of supermarket extra virgin olive oils, for what it's worth, so that oil could definitely be worth a second look. The Cook's Illustrated website (subscription required) doesn't note that they tasted the premium version, but the image of the bottle they used clearly says "Fruttato" on the label.


3rd place: Filippo Berio Extra Virgin Olive Oil, $14-$15 per liter


Both tasters found this oil to have a very clear flavor with a nice velvety richness to it. Taster One thought it had a "very herbal flavor, but didn't contain a lot of sweetness." Taster Two thought it was fruity and pleasant, but too mild--it lacked any real assertive, peppery, green elements. "It seems like it could be boring if you used it in a recipe rather than tasting it straight."


2nd place: 365 (Whole Foods brand), $14 per liter


This one started slow and picked up. On first taste, Taster One thought 365
"[didn't have] a strong flavor, but had a decent fruitiness." It did, Taster One noted, have enough flavor to show up well when tasted with bread. "Nice and light...with some sweetness," Taster One concluded.

Taster Two was underwhelmed at first, but then noticed some "fruitiness backed up with some assertive peppery tang....This one won me over."

For the price of $6.99 per 17-oz bottle, not a bad choice. However, the hands down winner was...


1st place: Columela Artesano Extra Virgin Olive Oil, $30-$35 per liter


There wasn't really any contest. Taster One found Columela "fruity and herbal, with a nice bite while remaining sweet enough...Not an overwhelming flavor, but held up on bread and was not too greasy or oily." Taster Two liked the "green, sharp" beginning flavor that was tangy without being overwhelming (like the Colavita). The tasters thought this was by far the most well-rounded oil, with the "best olive flavor" and balance of tangy and sweet.


So, what's the verdict?


While DaVinci and Colavita both received one fourth place and one fifth place vote each, for the remaining olive oils, the two tasters agreed right down the line the oils that were in first, second, and third place.

If you have the money, the Columela Artesano Extra Virgin Olive Oil (an unfiltered blend of four different varieties of Spanish olive) is highly recommended. It usually retails for between $15-$18 per 500-mL bottle, more than twice the price of the runner-up, 365. For my money, it's more than worth it, particularly for special occasions or dishes where the flavor of the olive oil will make a significant difference.

Both can be difficult to find. Unfiltered olive oils, although they frequently have more olive flavor than filtered versions, have a shorter shelf life because the particulate matter can speed up spoilage. This means that most supermarkets won't carry unfiltered oils, unless you happen to live in or near a place where such oils get high turnover (like, say, Brookline, home of Cook's Illustrated magazine, and foodie haven). 365 brands, on the other hand, are sold exclusively in Whole Foods stores, which might not be convenient unless you live near one--and they (ahem) also tend to congregate in areas in which might be classified as foodie havens. Or, at least, areas where people are willing to pay extra for "quality".

In that case, Columela Extra Virgin Olive Oil, the filtered version of Columela Artesano, should be available at more stores. There are also online retailers, even Amazon, which carry olive oils, although frequently they are not particularly price-competitive, especially when you factor in shipping. Colavita, while too pungent for tasting straight, should work well in recipes that call for strong flavors.

My personal plan is to keep 365 Extra Virgin Olive Oil on hand for everyday use, and Columela Artesano for special occasions or just to eat with crusty bread from my fantastic local bakery...which is, as they say, another post.

Now I have to go back to that checkout woman at Whole Foods and pronounce my peccavi for doubting her and her "twelve years in grocery".

Tuesday, July 28, 2009

A Culinary Trip to Ireland: Ballymaloe Farm


The Ballymaloe Cookery School is in the middle of an organic farm, including an herb garden, greenhouses, free range chickens, dairy and beef cattle, among many other things. Darina Allen, the head of the school, is a big proponent of the "Slow Food" movement (she is the Councillor for Ireland in that organization).


Given that background, it's no surprise that Darina supports people growing and raising their own food, including chickens. (She very generously gives people like me who live in high-rise apartment buildings with no balconies dispensation to buy instead.) One of the highlights of the 3-day course I took was jointing a whole chicken, which yields enough food for more than a week for someone like me.


As she pointed out--multiple times,in fact--a single whole chicken will yield 2 each of breasts, wings, thighs, drumsticks, as well as chicken skin (good for baking until crispy), wingtips, neck, and bones suitable for stock, and liver for pate (which I don't personally care for, but I'm sure other people like). A whole organic chicken can cost about $22-$26 (about $5.49 a pound), compared to $4-$5 (at about .99 cents a pound, sometimes it's as little as .49 cents) for a whole standard chicken. Whole chickens also tend to keep better longer, at least before you portion it out. Now that I've actually jointed a whole chicken, I can't see buying chicken breasts unless I'm pressed for time.


One thing I'm dead envious of at Ballymaloe is all the lettuce, vegetable, and herb garden space they've got. I can't help but think it would be much easier to eat better and more varied salads on a regular basis if I had access to this kind of facility in Boston. (Well, as long as I am wishing, I'd like a staff of a prep cooks like they had at Ballymaloe as well. I did try to grow some hydroponic herbs in my apartment and all I got was mice.) The salads they served with lunch at Ballymaloe were excellent, full of enough different types of lettuce and herbs for a variety of texture and flavor. I'm sure it helped that we were there in mid-July.


Ballymaloe also grows nearly a dozen different varieties of heirloom tomatoes, which I can tell you are delicious. I have some pictures of the resulting tomato salad Darina's team prepared, which I'll put up in a future post. It is prepared with all of the tomatoes dressed and served in a single layer, to avoid having to toss the tomatoes and break them up.


Ballymaloe grows enough onions, shallots, and garlic for their own use as well as distribution to some local programs. They hang them from the rafters, tops still attached, to dry in small bunches of no more than 4, to avoid bruising and rotting. The gardener--Darina's husband--contended that letting the vegetables and herbs dry with the leaves still on helps to retain nutrients and flavor in the bulb part of the plant. I won't argue--the results look and taste gorgeous.


Coming up next: more about the cooking demonstrations and lessons at Ballymaloe Cookery School (and maybe a recipe or two...)


A Culinary Trip to Ireland: Prequel

I'll soon be posting about my trip to the Ballymaloe Cookery School (in Shanagarry, Co. Cork, Ireland), as well as some of the dishes eaten at restaurants on the way.

Just as a little preview, though, here is a picture of a fast food restaurant in Cork city...
You could never get away with this in the States!

Thursday, July 2, 2009

Oven Fries

Normally in late June and early July, I would be trying to make my favorite grilled "puzzle" potatoes. (Take a potato, slice it crosswise into verrry thin pieces, keep the potato slices assembled in their original order, add a pat of butter, salt, and pepper, wrap in aluminum foil, and grill.) However, so far summer has very much failed to deliver in the weather-appropriate-to-grilling department, so, I tried a Cook's Illustrated alternative--oven fries. They came out great! These pictures really don't do them justice.
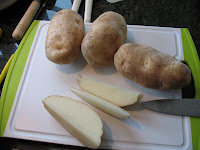


Ingredients
3 russet potatoes (about 8 oz), sliced lengthwise into 10-12 spears each
5 tablespoons olive oil
salt and pepper

Hardware
18 by 12 inch heavy-gauge baking sheet, preferably nonstick--or, you can use my favorite easy clean-up trick--aluminum foil! (If you use a smaller sheet, you may need to do two batches.)

Directions
1. Adjust oven rack to lowest position; heat oven to 475 degrees. Place potatoes in large bowl and cover with hot tap water; soak 10 minutes. Meanwhile, coat 18 by 12-inch heavy-duty rimmed baking sheet with 4 tablespoons oil and sprinkle evenly with 3/4 teaspoon salt and 1/4 teaspoon pepper; set aside.

2. Drain potatoes. Spread potatoes out on triple layer of paper towels and thoroughly pat dry with additional paper towels. Rinse and wipe out now-empty bowl; return potatoes to bowl and toss with remaining 1 tablespoon oil. Arrange potatoes in single layer on prepared baking sheet; cover tightly with foil and bake 5 minutes. Remove foil and continue to bake until bottoms of potatoes are spotty golden brown, 15 to 20 minutes, rotating baking sheet after 10 minutes. Using metal spatula and tongs, scrape to loosen potatoes from pan, then flip each wedge, keeping potatoes in single layer. Continue baking until fries are golden and crisp, 5 to 15 minutes longer, rotating pan as needed if fries are browning unevenly.

3. Transfer fries to second baking sheet lined with paper towels to drain. Season with additional salt and pepper to taste and serve.