Showing posts with label recipe. Show all posts

Sunday, November 18, 2012

Apple Pie with All-Butter Crust

I've been less and less satisfied with the pie crusts I've been producing. They've been getting more and more complicated to put together. Do I have Crisco? (I never have Crisco, since I only ever buy it once a year.) Wet the flour with vodka...no, not vodka, calvados! With a spray bottle! With ice cubes in it! Dig out the food processor. Pulse process--is the butter pea-sized yet? (You can look back at my original post for apple pie to see all the steps I'm talking about.) And it would take me forever to roll out the dough, and it was cracking, and it never seemed flaky. Maybe I just suck at pastry, I thought.

So, I was looking for something else to try. I found Smitten Kitchen's recipe for all butter, really flaky pie dough. She [Deb Perelman] had been using the same Cook's Illustrated/America's Test Kitchen recipe that I had been working with. One by one, she enumerated all the problems she had with what she'd been doing. And she proposed ditching the shortening, the vodka, the food processor...all the things that had made pie crust such a pain. That left just five ingredients--flour, butter, sugar, salt, and water--and minimal equipment. Could it be that easy?

Friday, October 5, 2012

Guinness Beef Stew

I adapted this recipe from a few sources (Miliken and Feniger's recipe at FoodNetwork.com, Kathy Maister's recipe at Startcooking.com) and love it enough that I've revived my food blog to bring it to you!

Guinness Beef Stew with bread
I really wanted a single-pot dish with a long, slow cooking process, so my neglected Dutch oven can get its much-needed autumn workout. Accordingly, I went for beef chuck (a tasty, not too fatty option that can stand up to long cooking), and decided to buy a full roast and trim it down into stew pieces myself. If you go that route, be prepared to buy at least a three-pound roast, since you'll lose some fat or connective tissue when you trim. Pre-packaged stew meat would be absolutely fine.

Serve this stew with a nice hearty bread--a soda bread would be great! (The bread in the photo is actually a sweet sourdough bread with a great chewy texture.) If you prefer to serve with mashed or cooked potatoes, feel free to leave the potatoes out of the stew itself.

Recipe after the jump!

Sunday, May 23, 2010

Saté-Spiced Roast Chicken

Honestly, I'm slightly embarrassed to post this one. I hadn't planned to--hence no photos, since I don't have my camera available--but this is the second or third time that I've posted a menu of what I'm cooking in a Facebook status update and gotten some reminder that I haven't blogged about it yet. (One of the main barriers to me posting more frequently is that I really want these posts to be illustrated, and that requires that I plan ahead a bit more than I sometimes do. It's no coincidence that I post more often around the holidays, when I have planned dishes days or weeks in advance!)


The other reason I'm slightly embarrassed to post this one is that it is ridiculously simple. Simple can be really good, though, and it certainly is more manageable on a weeknight. I can easily see adding this recipe to the rotation. It's an easy, cheap(ish) cut of meat to buy, and you do practically nothing except sprinkle seasoning on the meat and throw it in the oven for 30 minutes. Keeping the skin and bones on the meat adds flavor and juiciness to the final product, plus you get a delicious crispy skin which you can gobble down guiltily.


A word about the saté [sah-TAY] seasoning. This is usually used on chicken satay, those marinated chicken pieces skewered, grilled, and served with spicy peanut sauce as an appetizer at innumerable restaurants and parties (see right), so it's more familiar than you think. The seasoning blend is Indonesian in origin, and the version I use came from Penzeys, and is made up of salt, brown sugar, garlic, white onion, coriander, purple shallots, ginger, turmeric, sweet paprika, Ancho pepper, galangal, cayenne red pepper, and lemongrass. I added a bit more ground coriander, because, well, I like coriander. How traditional this blend is I don't know, but it is yummy. The chicken tastes even more chickeny--nutty, spicy, with a little bit of heat, even some slightly sweet herbal notes. (Image courtesy Jaakko from Wikimedia Commons, used under Creative Commons Attribution-Sharealike License 3.0.)


So, now the recipe, which is based on one from America's Test Kitchen Family Cookbook. Here is a similar recipe from the Cook's Illustrated website.


Ingredients
  • 2 split chicken breasts, skin-on, bone in
  • 1 tablespoon unsalted butter, melted and (slightly) cooled
  • 3-6 tablespoons saté seasoning
  • kosher salt
  • black pepper, freshly ground 
Hardware
  • oven safe dish at least 10" wide 
(ATK/Cook's Illustrated recommends cooking the chicken on a broiler rack over a broiler pan covered in aluminum foil. I see their point--fat drips away from the meat, better heat circulation, etc.--but I was cooking just one split chicken breast, and that seemed like a lot of work for half a chicken breast. I used a 9" Pyrex pie dish, the chicken came out really well. Whatever you choose to use, make sure that the chicken you are cooking has plenty of room around it so it cooks evenly and the skin crisps, and you'll be fine.)


Directions
  1. Adjust oven rack to middle position; heat oven to 450 degrees. 
  2. Sprinkle underside of chicken breasts liberally with salt, pepper, and saté seasoning.
  3. Loosen the skin covering each 1/2 breast with your finger, and pull away from the meat. Season meat liberally with salt, pepper, and saté seasoning. Replace skin and rub in the butter, then sprinkle skin liberally with pepper. 
  4. Place split breasts in cooking dish, bone side down and skin side up. Move dish to the oven, and roast until thickest part of breast registers 160 degrees on instant-read thermometer, 25 to 35 minutes.
  5. Transfer chicken to cutting board and let rest 5 minutes. Carve and serve immediately.
Serves 2-3.

Tuesday, December 1, 2009

Chewy Chocolate Chip Cookies


Surviving Halloween has never been a problem for my diet. For some reason, I find candy in any form, including chocolate, eminently resistable. However, if you have been reading this blog for any length of time, you know my weakness--baked goods. Pies, pastries, cookies, they all make me weak in the knees  (and in the backbone).

However, if I am going to consume the calories, I want the experience to be worth it, and that means the texture needs to be just right. The pastry should be buttery and flaky, and the cookies must be chewy and moist. (This is why I usually find storebought cookies less than tempting, and also perhaps why I've become ever-so-slightly obsessed with baking my own once I found out how easy it was.)

If, like me, you are a fan of a chewy cookie, this is a great recipe, based on Alton Brown's infamous "The Chewy". A couple tips--using bread flour, which has more protein, in place of all-purpose flour makes for more gluten (what makes good bread chewy) in the finished product. Chilling the dough before baking keeps the cookie from spreading too much in the oven, allowing the exterior to set before the interior has lost too much moisture. Finally, an overbaked cookie will never be chewy and moist, so underbaked is best. The center of the cookie should not be completely set--try to pull the cookies when you can just pick up the edge of a cookie, and it bends, not breaks; then let them finish up outside the oven on the hot cookie sheet for 5 minutes before moving to a wire rack to finish cooling. If the cookie looks baked all the way through, it is already too late (sob!)

With these tips, your cookies should still be chewy goodness three days after you've baked them.

Ingredients
2¼ cups bread flour
2 sticks unsalted butter
1 teaspoon kosher salt
1 teaspoon baking soda
¼  cup sugar
1¼ cups brown sugar
1 egg
1 egg yolk
2 tablespoons milk
1½ teaspoons vanilla extract
2 cups semisweet chocolate chips (I recommend Ghirardelli 60% Cacao Bittersweet chips)


Hardware
Ice cream scooper (Alton Brown recommends "a #20 disher, to be exact", but if you don't have one, try a 1/8 cup measure or 2 tablespoons)
Parchment paper
Baking sheets
Mixer (stand or hand)
wire cooling rack

Directions
1. Heat oven to 375 degrees F.
2. Melt the butter in a heavy-bottom medium saucepan over low heat. Sift together the flour, salt, and baking soda and set aside.
3. Pour the melted butter in the mixer's work bowl. Add the sugar and brown sugar. Cream the butter and sugars on medium speed. Add the egg, yolk, 2 tablespoons milk and vanilla extract and mix until well combined. Slowly incorporate the flour mixture until thoroughly combined. Stir in the chocolate chips.
4. Chill the dough, then scoop onto parchment-lined baking sheets, 6 cookies per sheet. Bake for 14 minutes, checking the cookies after 5 minutes, or until golden brown around the edges (but not yet set in the middle). Rotate the baking sheet for even browning. Cool for 5 minutes on the cookie sheet, then remove cookies to a wire cooling rack. Store in an airtight container.

Saturday, November 28, 2009

Bread Stuffing with Sausage, Cranberry, and Dried Apple


Our family stuffing has always included sausage. Nothing brings a flavor punch like a pound of pork sausage browned up and added to your stuffing (especially when it's not actually going in the bird). This is the second or third year that I've been preparing stuffing for the Thanksgiving and Christmas holiday meals, and it's undergone some evolutions. We started adding dried cranberries to the bread stuffing once dried sweetened cranberries became available regularly; this Thanksgiving I had dried apples on hand, and the added sweetness went well with the pork sausage.

This recipe is based on America's Test Kitchen's basic "Classic Stuffing for a Crowd" recipe, which is a great base for trying your own interpretations for the next holiday gathering. It's very easy, and can be made with (plain) storebought bread cubes in place of homemade--just make sure to increase the amount of chicken broth to 7 cups to compensate for the lower moisture content.

ATK points out that you can air-dry the bread cubes if you work it a day (or, ideally, two) ahead of time; but, if you don't want 5 cookie sheets with ½-inch bread cubes drying in a single layer taking up counter space in your kitchen, you can dry the cubes in a 300-degree oven for 30-60 minutes and let them cool prior to mixing with the other ingredients.

Ingredients
1½ pounds bulk breakfast sausage
12 tablespoons butter (1½ sticks), plus extra for baking dish
4 medium ribs celery, chopped fine
2 medium onions, minced
½ cup minced fresh parsley leaves
3 tablespoons minced fresh sage leaves (or 2 teaspoons dried)
3 tablespoons minced fresh thyme leaves (or 2 teaspoons dried)
1 tablespoon minced fresh marjoram leaves (or 1 teaspoon dried)
3 pounds high-quality sandwich bread (white), cut into ½-inch cubes and dried
1 ½ cups dried sweetened cranberries
¾ cup dried apple, diced medium
5 cups chicken stock or low-sodium chicken broth
4 large eggs, beaten lightly
2 teaspoons table salt
2 teaspoons ground black pepper

Hardware
large skillet (12 inches minimum)
very large mixing bowl
wooden spoon
15 x 10-inch baking dish (see step 3 for substitutions)
baking sheet (for drying bread cubes)
aluminum foil

Instructions

1. Adjust oven rack to center position and heat oven to 400 degrees. Cook sausage in a large skillet over medium heat, breaking it up into smaller pieces with a wooden spoon, until lightly browned, 5 to 10 minutes. Remove the sausage from the skillet and reserve. Drain the fat, and reserve.


2. Either add all the butter to the now empty skillet, or substitute the reserved sausage fat for an equal amount of butter -- you'll need a total 12 of tablespoons of fat. Add the celery and onion and sauté, stirring occasionally, until softened, about 10 minutes. Stir in parsley, sage, thyme, and marjoram and cook until fragrant, about 1 minute longer. Transfer to a very large mixing bowl.


3. Add the sausage, cranberries, apple, dried, cooled bread, stock or broth, eggs, salt, and pepper to the vegetables and toss gently to distribute dry and wet ingredients evenly. Turn mixture into buttered 15-x 10-inch baking dish. (If you don't have a 15 x 10 dish, here is a guide to substitutions--more mixture in a smaller dish means a denser texture.)

4. Cover with foil and bake for 25 minutes. Remove the foil and continue to bake until golden, about 30 minutes longer. Cool for 10 minutes before serving.


To Make Ahead: The stuffing can be assembled in the baking dish, then wrapped tightly in plastic wrap and refrigerated for up to 24 hours before baking. To bake, let the stuffing stand at room temperature for 30 minutes. Remove the plastic wrap and proceed to bake as directed in step 3.

Sunday, October 4, 2009

Cranberry Shortcake


"Cranberry shortcake?"
Don't sound so dubious, this will be delicious. I first made this dessert last year for some friends during one of our infamous card nights (Euchre, anyone?) But I've been eating this dessert for much longer than that--every fall that I can remember, the restaurant at the annual church fair serves up hundreds of these things. This is one of the stars of the fair, every year.

There are some truly heinous recipes for cranberry shortcake out there. Many of them are methods of using up leftover Thanksgiving cranberry sauce. Imagine jellied cranberry sauce over pound cake or angel-food cake and you get the idea. This recipe uses fresh cranberries and has a great tart-sweet flavor. It's also incredibly easy to make.

My personal prejudice when it comes to any dish that calls itself "shortcake" is that nothing that could, on its own, be called "cake"--that is, angel food cake, chiffon or yellow cake, pound cake, etc.--should ever be involved. "Shortcake" means one thing, and one thing only: biscuits. This recipe calls for buttermilk biscuits, which I've included instructions for, but if you don't feel like going to that kind of effort, just use Bisquick--it'll be fine.


Ingredients
Fruit
2 cups of fresh cranberries
1 medium apple
1 banana
2/3 cup sugar

Biscuits
2 cups unbleached all-purpose flour (10 ounces)
2 teaspoons baking powder
2 tablespoons sugar
3/4 teaspoon table salt
2/3 cup buttermilk, cold (see note)*
1 large egg
8 tablespoons unsalted butter, melted and cooled slightly

Whipped cream
1 cup heavy cream
1 tablespoon sugar
1 teaspoon vanilla extract

Hardware
food processor
hand mixer or stand mixer
3 bowls (for whipped cream, biscuit dough, and cranberries)
baking sheet

Directions

For the Fruit:
  1. Coarsely chop cranberries and apple. (Make this easy on yourself and pulse in a food processor. Who wants to chop 2 cups of cranberries?) Add sugar to taste and mix until blended.
  2. Refrigerate cranberry mixture 2 to 3 hours to mingle flavors.
  3. Dice the banana and add to mixture shortly before assembling shortcakes.

For The Biscuits:
  1. Adjust oven rack to middle position and preheat oven to 475 degrees.
  2. Whisk flour, baking powder, 1 tablespoon sugar, and salt in large bowl.
  3. Whisk together buttermilk and egg in medium bowl; add melted butter and stir until butter forms small clumps.
  4. Add buttermilk mixture to dry ingredients and stir with wooden spoon until dough comes together and no dry flour remains. Continue stirring vigorously for 30 seconds.
  5. Using greased 1/2 cup dry measure, scoop up mound of dough and drop onto parchment-lined rimmed baking sheet (if dough sticks to cup, use small spoon to pull it free). Repeat with remaining dough, spacing biscuits about 1 1/2 inches apart, to create 4 biscuits.
  6. Sprinkle remaining tablespoon sugar evenly over top of biscuits. Bake until tops are golden brown and crisp, about 15 minutes. Transfer to wire rack and let cool 15 minutes before assembling.

For The Whipped Cream:
  1. Using hand mixer or stand mixer fitted with whisk attachment, beat cream, sugar, and vanilla on low speed until bubbles form, about 30 seconds.
  2. Increase speed to medium; continue beating until beaters leave trail, about 30 seconds longer.
  3. Increase speed to high; continue beating until nearly doubled in volume and whipped cream forms soft peaks, 30 to 45 seconds longer.

To Assemble:
Split each biscuit in half and place bottoms on individual serving plates. Spoon portion of cranberry mixture over each bottom. Top cranberries with 2 tablespoons whipped cream, cap with biscuit top, and dollop each shortcake with some of remaining whipped cream. (Or, add more cranberries and even more whipped cream.) Serve immediately.

Makes 3-4 servings

*Don't feel like buying buttermilk? Add lemon juice to regular milk (at least 2% fat) in the ratio of 1 tablespoon to 1 cup, and let stand for 15 minutes. Use for an equal volume of buttermilk in any recipe.

Thursday, July 2, 2009

Oven Fries

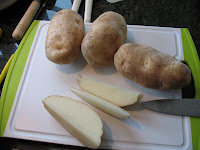
Normally in late June and early July, I would be trying to make my favorite grilled "puzzle" potatoes. (Take a potato, slice it crosswise into verrry thin pieces, keep the potato slices assembled in their original order, add a pat of butter, salt, and pepper, wrap in aluminum foil, and grill.) However, so far summer has very much failed to deliver in the weather-appropriate-to-grilling department, so, I tried a Cook's Illustrated alternative--oven fries. They came out great! These pictures really don't do them justice.


Ingredients
3 russet potatoes (about 8 oz), sliced lengthwise into 10-12 spears each
5 tablespoons olive oil
salt and pepper

Hardware
18 by 12 inch heavy-gauge baking sheet, preferably nonstick--or, you can use my favorite easy clean-up trick--aluminum foil! (If you use a smaller sheet, you may need to do two batches.)

Directions
1. Adjust oven rack to lowest position; heat oven to 475 degrees. Place potatoes in large bowl and cover with hot tap water; soak 10 minutes. Meanwhile, coat 18 by 12-inch heavy-duty rimmed baking sheet with 4 tablespoons oil and sprinkle evenly with 3/4 teaspoon salt and 1/4 teaspoon pepper; set aside.

2. Drain potatoes. Spread potatoes out on triple layer of paper towels and thoroughly pat dry with additional paper towels. Rinse and wipe out now-empty bowl; return potatoes to bowl and toss with remaining 1 tablespoon oil. Arrange potatoes in single layer on prepared baking sheet; cover tightly with foil and bake 5 minutes. Remove foil and continue to bake until bottoms of potatoes are spotty golden brown, 15 to 20 minutes, rotating baking sheet after 10 minutes. Using metal spatula and tongs, scrape to loosen potatoes from pan, then flip each wedge, keeping potatoes in single layer. Continue baking until fries are golden and crisp, 5 to 15 minutes longer, rotating pan as needed if fries are browning unevenly.

3. Transfer fries to second baking sheet lined with paper towels to drain. Season with additional salt and pepper to taste and serve.

Thursday, April 2, 2009

Brown Sugar Cookies

These are also known as the Coma Cookies...diabetics need not apply! The recipe comes from the March 2007 issue of Cook's Illustrated, and it's always been a big hit for gifts, bake sales, and just a little dessert now and again. It's also another great pantry standby because all the ingredients are things I commonly keep on hand--plus, they're really easy and fun to make!

The brown sugar combines with the browned butter for a rich, caramel-like flavor. I tend to go for a chewier cookie, so I add an extra few tablespoons of melted (not browned, since some moisture is lost in browning) butter.

Ingredients:
  • 14 tbs unsalted butter (1 3/4 sticks)(I add the remainder of the second stick of butter for a chewier cookie)
  • 1/4 cup granulated white sugar (about 1 3/4 ounces)
  • 2 cups packed dark brown sugar (14 ounces)
  • 2 cups unbleached all-purpose flour plus 2 tablespoons (about 10 1/2 ounces)
  • 1/2 tsp baking soda
  • 1/4 tsp baking powder
  • 1/2 tsp table salt
  • 1 large egg
  • 1 large egg yolk
  • 1 tbs vanilla extract

Hardware
  • stainless steel saucepan or skillet
  • 2 cookie sheets
  • parchment paper (although aluminum foil does in a pinch)
  • heatproof bowl
  • medium to large mixing bowl
  • spatula
  • shallow dish or pie pan

Instructions
  1. Heat 10 tablespoons butter in 10-inch skillet over medium-high heat until melted, about 2 minutes. Continue to cook, swirling pan constantly until butter is dark golden brown and has nutty aroma, 1 to 3 minutes. Remove skillet from heat and transfer browned butter to large heatproof bowl. Stir remaining 4 (6 for chewy cookies) tablespoons butter into hot butter to melt; set aside for 15 minutes.
  2. Meanwhile, adjust oven rack to middle position and heat oven to 350 degrees. Line 2 large (18 by 12-inch) baking sheets with parchment paper. In shallow baking dish or pie plate, mix granulated sugar and 1/4 cup packed brown sugar, rubbing between fingers, until well combined; set aside. Whisk flour, baking soda, and baking powder together in medium bowl; set aside.
  3. Add remaining 1 3/4 cups brown sugar and salt to bowl with cooled butter; mix until no sugar lumps remain, about 30 seconds. Scrape down sides of bowl with rubber spatula; add egg, yolk, and vanilla and mix until fully incorporated, about 30 seconds. Scrape down bowl. Add flour mixture and mix until just combined, about 1 minute. Give dough final stir with rubber spatula to ensure that no flour pockets remain and ingredients are evenly distributed.
  4. Divide dough into 24 portions, each about 2 tablespoons, rolling between hands into balls about 1 1/2 inches in diameter. Working in batches, toss balls in reserved sugar mixture to coat and set on prepared baking sheet, spacing them about 2 inches apart, 12 dough balls per sheet. (Smaller baking sheets can be used, but it will take 3 batches.)
  5. Bake one sheet at a time until cookies are browned and still puffy and edges have begun to set but centers are still soft (cookies will look raw between cracks and seem underdone; see photo below), 12 to 14 minutes, rotating baking sheet halfway through baking. Do not overbake.
  6. Cool cookies on baking sheet 5 minutes; using wide metal spatula, transfer cookies to wire rack and cool to room temperature.

Saturday, March 14, 2009

Diner-Style French Toast

Alton Brown and America's Test Kitchen aren't always right. Well, mostly they are, but I vividly recall my father saying as he watched Alton Brown spatchcock a duck, "That's really interesting. I can't imagine ever wanting to actually do that, but it's interesting."

He had a point. Some recipes from ATK or Alton Brown seem, if not unnecessarily complicated, perhaps trying to accomplish something beyond the basic--admirable in some cases, but in the case of french toast, it's not what I'm looking for.

I've been making french toast since I was in the single digits, and it's still what I will order in a restaurant if I'm there for a weekend brunch. I've always been frustrated when I made my version, because it didn't look--or taste--like the french toast I got at a diner. I knew that part of it was the bread--thin slices of wheat bread, while great for sandwiches, were not, I knew, what the diner was making their french toast out of. The wheat bread I had made a very tough, dry french toast--diner french toast was thicker, and stayed moist but not soggy on the inside, while the outside got brown with eggy goodness.

The answer I eventually worked out was Texas Toast, available for about $2.75/loaf at Trader Joe's. Regular white sandwich bread (like the Farmhouse-style from Pepperidge Farm) will do if there is no TJ's nearby. A slice of Texas Toast is about 3/4 of an inch wide, compared to 1/2 of an inch for regular sandwich bread. This helps the toast stay moist on the inside.

I tried both Cook's Illustrated and Alton Brown's recipes for french toast. They were good, but a) they were overly complicated--CI's in particular requires 8 different ingredients, including whole milk, which I don't typically keep on hand--and b) the flavor they made was classic, rich, and French-inspired. I want diner, not petit dejeuner. So here is my adapted version, which borrows a couple ideas but definitely looks more like something a lady named Muriel might hand you on a bleary Sunday morning.

Ingredients
  • 3 slices Texas Toast
  • 1/2 cup of milk (I use 2% because it's what I have)
  • 2 large eggs
  • 1 tbs vanilla extract (optional)
  • 1/2 tbs of butter
Hardware
  • nonstick frying pan/skillet
  • pie plate or other receptacle for egg mixure (microwave safe)
  • whisk or fork for beating eggs

Directions
  1. Beat eggs and milk together. Add butter to mixture in small pieces, and microwave mixture (up to 1 minute) until butter melts. (Keep a close eye on this and stir if necessary so the egg doesn't cook, just warms. Microwaves differ, and I've had some unpleasant surprises.)
  2. Add vanilla to egg mixture, and stir to combine.
  3. Let each piece of bread soak in egg mixture, 30-60 seconds each side, and then set aside to rest on a plate while the skillet heats over a medium flame. (A drop of water put in the skillet should boil quickly, but not skitter all over the surface of the skillet.)
  4. Fry the pieces of toast until brown on both sides, about 3 min per side. (You can choose to put butter in the skillet to truly "fry" the french toast, but with a good, heavy non-stick skillet, I've never actually found that necessary in order to brown.)
  5. Let finished toast slices wait in a 250 degree oven while you finish the remaining slices. The slices can stay in the oven up to 45 minutes, if preparing for a crowd.
  6. Serve with butter and icing sugar, maple syrup, or fresh fruit as desired.

Friday, January 30, 2009

Spaghetti with Balsamic Tomatoes

This is something I put together the other day out of (almost) pantry-only ingredients; in any case, the ingredients are ones I tend to keep on hand. (If fresh basil isn't immediately available, then dried might be an option. You'll lose a certain amount of "brightness" in the final product and some eye appeal, but the balsamic vinegar has a fair amount of brightness to begin with.)

Depending on the balsamic vinegar you have, adding brown sugar to the braising tomatoes may not be necessary. The vinegar I use for this recipe is cheap--it comes in a half-gallon jug, really watery and pungent--which is why reducing it to this extent, which thickens it and reduces the harshness, is preferable to trying it straight. There's really no reason to use good-quality balsamic vinegar here, though; it would be a terrible waste.

Ingredients:
  • 1 pound spaghetti
  • 1 12-oz can of whole tomatoes (those packed in juice are preferable to those in puree)
  • 2 cloves garlic, sliced thin
  • 2 tbs + 2 tsp olive oil
  • 3/4 cup balsamic vinegar
  • 1-2 tbs brown sugar (optional)
  • 2 tbs fresh basil chiffonade
  • pinch kosher salt
  • pepper to taste
Directions
  1. Prepare pasta according to package directions. (I usually cook pasta 1-2 minutes less than the directions indicate to avoid mushy pasta.)
  2. Drain can of tomatoes in a colander. Remove seeds, stems, and cores from the whole tomatoes where possible. (With very small or young tomatoes, the cores may not be woody and will not need to be removed.)
  3. Heat 2 tbs olive oil in 12-inch nonstick skillet over medium high heat until shimmering.
  4. Saute the drained tomatoes in the skillet, breaking them up with a spatula until they are roughly chopped.
  5. Add balsamic vinegar to the tomatoes and cook until the vinegar is reduced into the tomatoes. You may add the brown sugar here if you wish, as well as salt, if necessary.
  6. Set the tomatoes aside, clean the pan, and add 2 tsp olive oil over medium heat.
  7. Saute garlic until golden with a pinch of kosher salt, then add to the tomato mixture
  8. Toss the pasta with the tomatoes and garlic; add the fresh basil and top with freshly grated parmesan.

Monday, December 29, 2008

Apple Pie

Cook's Illustrated, and its television show, America's Test Kitchen, are really my go-to source for all things cooking-related: recipes, tips, ratings of brands or gadgets. Whether I want to know the cheapest cut of meat that will taste good and pan-sear well, which brand of olive oil is a best buy, or a tip to get around a problem I didn't have the knowledge or the equipment to fix, Cook's Illustrated is where I look first.

So the recipe I've been experimenting with for apple pie, which is usually my responsibility at holiday dinners, is based on the one in The America's Test Kitchen Family Cookbook (a.k.a. my culinary bible). I've edited it over the past few holiday seasons based on my own experience, tips from family, and recipes from Alton Brown (a.k.a. The Man). It's still a work in progress, but below is the recipe as I've developed so far.

Hardware
  • 1 9-inch pie plate
  • rolling pin
  • cling wrap for refrigerating dough
  • food processor (not absolutely essential, but incredibly time-saving)
  • spray bottle for dispersing liquid into dough
  • baking sheet
Ingredients
For the crust:
  • 2 ½ cups all-purpose flour, plus extra for rolling out the dough
  • 2 tbs sugar
  • 1 tsp salt
  • 8 tbs Crisco or vegetable shortening, frozen or chilled in ice water
  • 12 tbs butter, unsalted, frozen, in ½-¾ inch cubes (don't stress about getting the butter completely uniform in size)
  • 6 to 8 tbs of vodka, brandy (or Calvados...Alton Brown recommends applejack) or liquor of choice; in a spray bottle with ice (water can be substituted if you prefer not to use alcohol in the recipe)
For the filling:
  • 2 lbs (4 to 6) Mclntosh apples, peeled, cored, and cut into wedges, about ½ inch wide
  • 1½ pounds (3 to 4) Granny Smith apples, peeled, cored, and cut into wedges, about ½ inch wide
  • ¼ cup + 1 tbs white sugar
  • 2/3 cup light brown sugar, tightly packed
  • ¼ cup dark brown sugar, tightly packed
  • 2 tbs flour
  • 1½ tbs lemon juice
  • 1 tsp fresh lemon zest
  • ½ tsp salt
  • 1 tbs cinnamon
  • 2 tsp nutmeg
  • a dusting of ground clove
Directions
For the crust:
  1. Process the flour, sugar, and salt in a food processor until combined. Scatter the shortening over the top and process until the mixture has the texture of coarse sand, about 10 seconds.
  2. Scatter the butter pieces over the top and, using short pulses, process the mixture until it resembles coarse crumbs, about 10 pulses. Transfer to a bowl.
  3. Use the spray bottle containing the liquor/ice mixture, gently mixing with a rubber spatula after every 5-6 sprays. Press the dough together with the spatula until the dough sticks together. (Test by grabbing a bit of dough and squeezing it in your fist. The dough should come together easily, but not be sticky.) If the dough does not come together, distribute the remaining liquid until it does.
  4. Divide the dough into two even pieces and flatten each into a 4-inch disk. Wrap the disks tightly in plastic wrap and refrigerate for 1 hour or overnight.
  5. Let the chilled dough soften slightly at room temperature before rolling it out and fitting the bottom crust into a 9-inch pie plate.

To Make Ahead: The dough can be refrigerated, wrapped tightly in plastic wrap, for up to 2 days or frozen for up to 2 months. Let the frozen dough thaw on the countertop until malleable before rolling.

For the filling:
  1. Adjust an oven rack to the lowest position, place a rimmed baking sheet on the rack, and heat the oven to 500°F (260°C).
  2. Toss the apples with ¼ cup of the white sugar, the light brown sugar, and the salt. Transfer the apple mixture to a colander and set to drain in the sink for about 45 minutes.
  3. While the apples are draining, roll out the top crust to a 12-inch circle.
  4. Transfer the apples from the colander back into the mixing bowl. Add the flour, spices, dark brown sugar, lemon juice, and lemon zest. Mix to combine.
  5. Spread the apples in the unbaked pie crust bottom, mounding them slightly in the middle. Loosely roll the top crust around the rolling pin, then gently unroll it over the apples.
  6. Trim all but 1/2-inch of the dough overhanging the edge of the pie plate with scissors. Seal the edge by pressing the top and bottom crusts together, then tuck the edges underneath. Crimp the edges, and cut four vent holes in the top. Brush the crust with the egg white and sprinkle with the remaining 1 tablespoon of sugar.
  7. Place the pie on the heated baking sheet and lower the oven temperature to 425°F (220°C). Bake until the top crust is golden, about 25 minutes. Rotate the baking sheet, reduce the oven temperature again to 375°F (190°C), and continue to bake until the juices are bubbling and the crust is deep golden brown, 30 to 35 minutes longer. Transfer the pie to a wire rack and cool to room temperature before serving.
To Make Ahead: The pie can be stored at room temperature, wrapped tightly in aluminum foil, for up to 2 days.

Wednesday, December 17, 2008

Shrimp Cocktail

This is Alton Brown's recipe for shrimp cocktail...it tastes better than in a restaurant. It's a snap to make, and I get raves every time! Brining them and then broiling them with the shell on makes them flavorful, tender, and avoids burning.

I use IQF (individually quick-frozen) shrimp in a bag rather than the "fresh" stuff from the seafood counter. Plus, it's already been de-veined (step 1). That is a task I gladly leave to someone else, although I've kept AB's directions for it here.

Time
  • 1 hour to overnight to thaw
  • 25 minutes to brine
  • 3 minutes to broil

Ingredients
  • 32 shell-on (21 to 25 count) tiger shrimp
For the brine:
  • 1/4 cup kosher salt
  • 1/4 cup sugar
  • 1 cup water
  • 2 cups ice
For the cocktail sauce:
  • 1 (14 1/2-ounce) can diced tomatoes, drained
  • 1/2 cup prepared chili sauce
  • 4 tablespoons prepared horseradish
  • 1 teaspoon sugar
  • Few grinds fresh black pepper
  • 1/2 teaspoon kosher salt
  • 1 tablespoon olive oil
  • Sprinkle Old Bay seasoning

Directions
  1. Using a pair of scissors or a serrated knife, make an incision down the backside of the shrimp, following the intestinal track. Eviscerate shrimp and rinse under cool water leaving shells intact.
  2. Place cleaned shrimp into a bowl with brine and refrigerate mixture for 20 to 25 minutes.
  3. While shrimp are brining, place tomatoes, chili sauce, horseradish, sugar, pepper, and salt in food processor and blend until smooth. Refrigerate cocktail sauce until ready to serve.
  4. Place a baking sheet or broiler pan under oven broiler and preheat for 5 minutes. Remove shrimp from brine and drain thoroughly. Rinse the shrimp under cold water and dry on paper towels. In a large bowl, toss shrimp with olive oil and sprinkle with Old Bay seasoning, if desired.
  5. Place shrimp onto a sizzling sheet pan and return to broiler immediately. After 2 minutes, turn the shrimp with a pair of tongs. Return the shrimp to broiler for 1 minute. Transfer to a cold cookie sheet. Refrigerate immediately.
  6. Once shrimp have chilled, arrange with cocktail sauce in a martini glass or as desired.

Caramelized Onion and Gorgonzola Tart


These make fantastic appetizers, and they are very easy to make. I've trotted these out at numerous events and have yet to have leftovers. I adapted the recipe from this one from Pepperidge Farm, which, not coincidentally, makes puff pastry. I've yet to try making puff pastry from scratch--it doesn't seem worth the headache, somehow. If you've tried it and have some advice for me, I'm very willing to hear it!

EDIT: I recently tried this recipe with shredded Gruyère in place of the Gorgonzola. I highly recommend it--the Gruyère melts really well, and its nuttiness sets off the sweetness of the caramelized onions. The Gorgonzola cheese is also good, just spicier...but, packaged puff pastry comes in packs of two sheets, so why not try both?

Thawing time: 40 minutes
Prep time: 10 minutes
Cook time: 15 minutes
Bake time: 20 minutes
Cooling time: 5 minutes


Ingredients
1 sheet of store-bought puff pastry
3 tablespoons vegetable oil
1-2 sweet onions, thinly sliced into half moons (total 2 cups uncooked)
1 cup crumbled Gorgonzola cheese (pre-crumbled saves time, but the pre-crumbled chunks can be too small and are usually a little drier than cheese you crumble yourself)
flour (for rolling out pastry)

Optional ingredients:
Chives, parsley, basil, or other herbs
salt and pepper (to taste)
1½ teaspoons brown sugar


Hardware
skillet
wooden spoon
baking sheet
rolling pin
grater (if using Gruyère)
fork
wire rack

Directions
1. Thaw the pastry sheet at room temperature for 40 minutes or until it's easy to handle. Heat the oven to 400°F. Line a baking sheet with parchment paper or spray with vegetable cooking spray.

2. Heat the oil in a 12-inch skillet over medium heat. Add the onion and cook for about 15 minutes or until dark golden brown, stirring often. Season to taste (brown sugar and/or salt) and let cool.

3. Unfold the pastry sheet on a lightly floured surface. Roll into a 12-inch square. Place on the prepared baking sheet. Brush the edges of the square with water. Fold over the edges ½ inch on all sides, pressing firmly with a fork to form a rim. Prick the pastry thoroughly with a fork.

4. Spread the onion mixture as evenly as possible over the pastry crust. Top with the Gorgonzola cheese. (You can add herbage on top here if you choose--chives, parsley, or even basil will work.)

5. Bake for 15-20 minutes or until golden and bubbly. Cool for 5 minutes on a wire rack. Cut into approximately 3 x 2-inch rectangles. Serve warm.